
What you’ll need
- Acces to cPanel admin panel
- Access to modify DNS settings from your domain registrar
- An email id to create an account at cloudfare.com
What you need to do
Be patient & follow all the 4 parts of this guide.
Part 1: Setup Your website to use cloudfare nameservers
Steps:
- Create a free account at cloudfare.com.
- Enter your domain name
- Choose the free $0 plan
- Access the DNS settings page by logging in to your domain registrar’s website (GoDaddy, Namecheap etc.)
- Replace your existing nameservers with the ones provided by cloudfare
Part 2: Obtain Origin Certificate and Private Key from Cloudflare
Next, we need to get an “Origin Certificate” and “Private Key” from Cloudflare. Later, we will install these in the cPanel.
Now, go to your Cloudflare account dashboard, “SSL/TLS” > “Origin Server”, then click on “Create Certificate”.
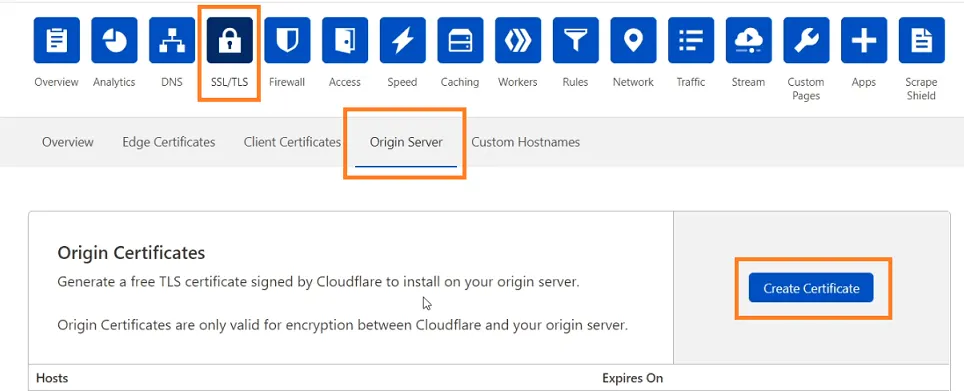
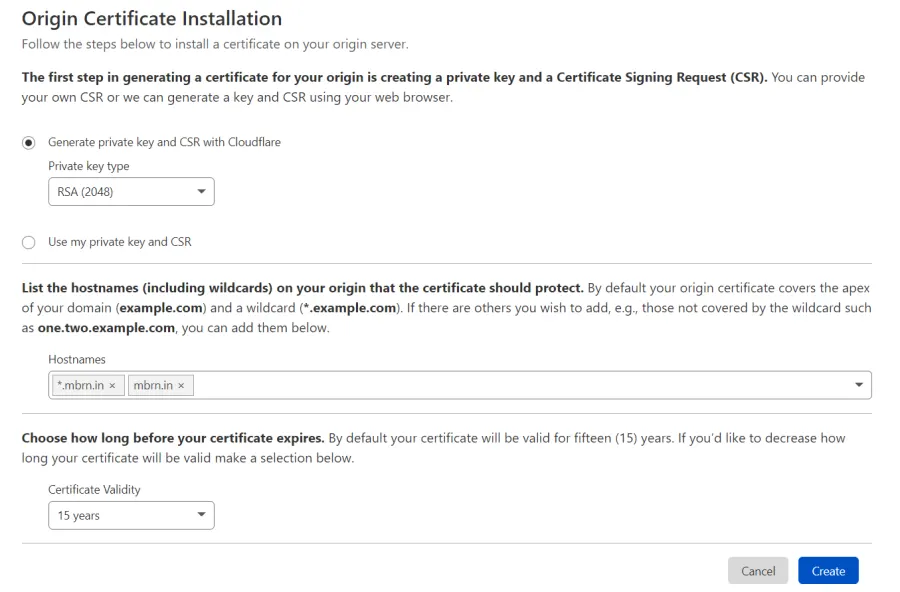
Cloudfare will fill in the domain name & wildcard domain. Leave everything to the default & click on create to get certificates.
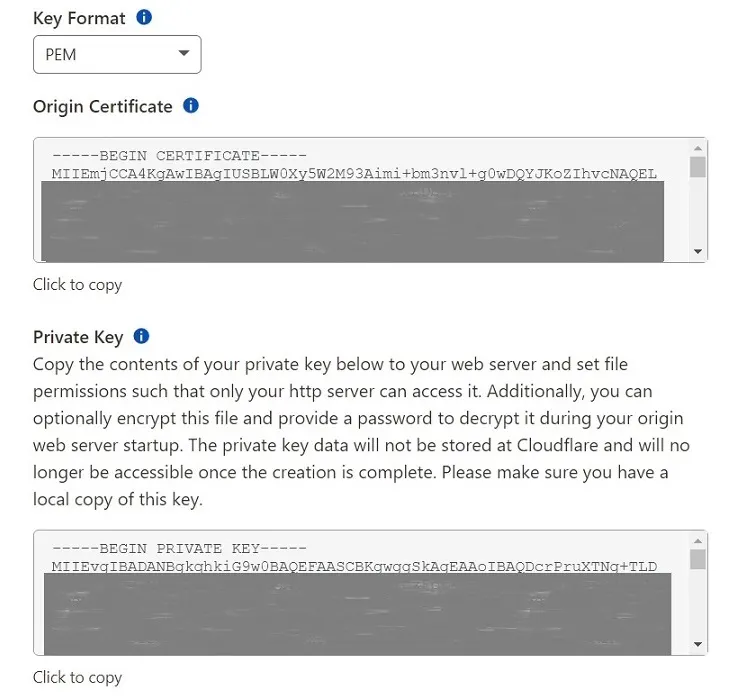
Now you should see something similar to this. Leave the format as PEM
Part 3: Uploading the Origin Certificate and Private Key to the server using cPanel
In your cPanel hosting, go to “SSL/TLS” under the “SECURITY” section. Then click on Manage SSL sites as shown below.
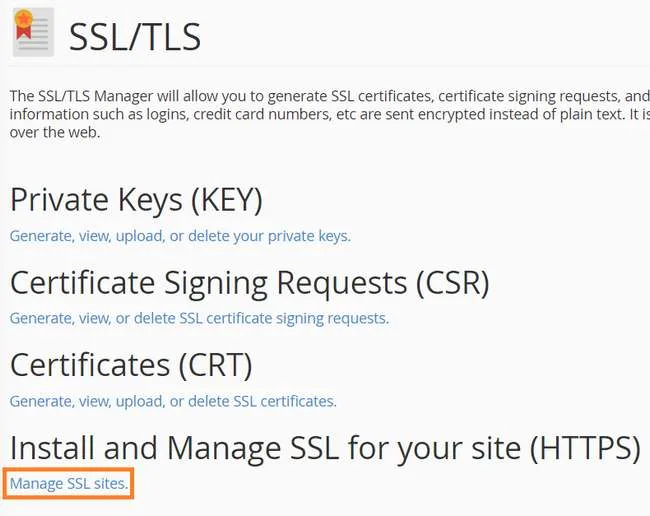
Now choose the option which looks like this
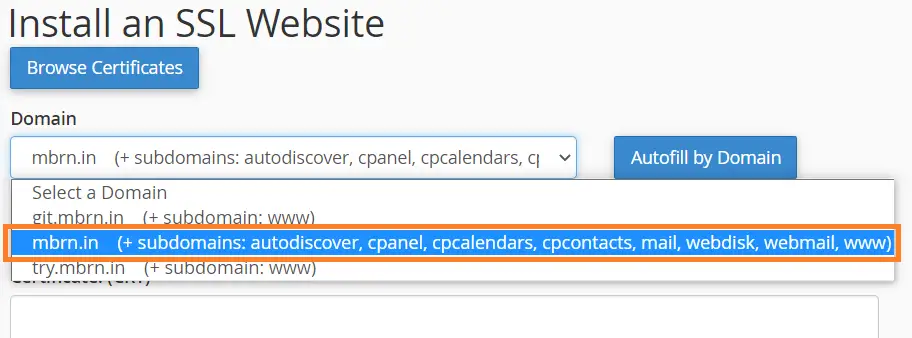
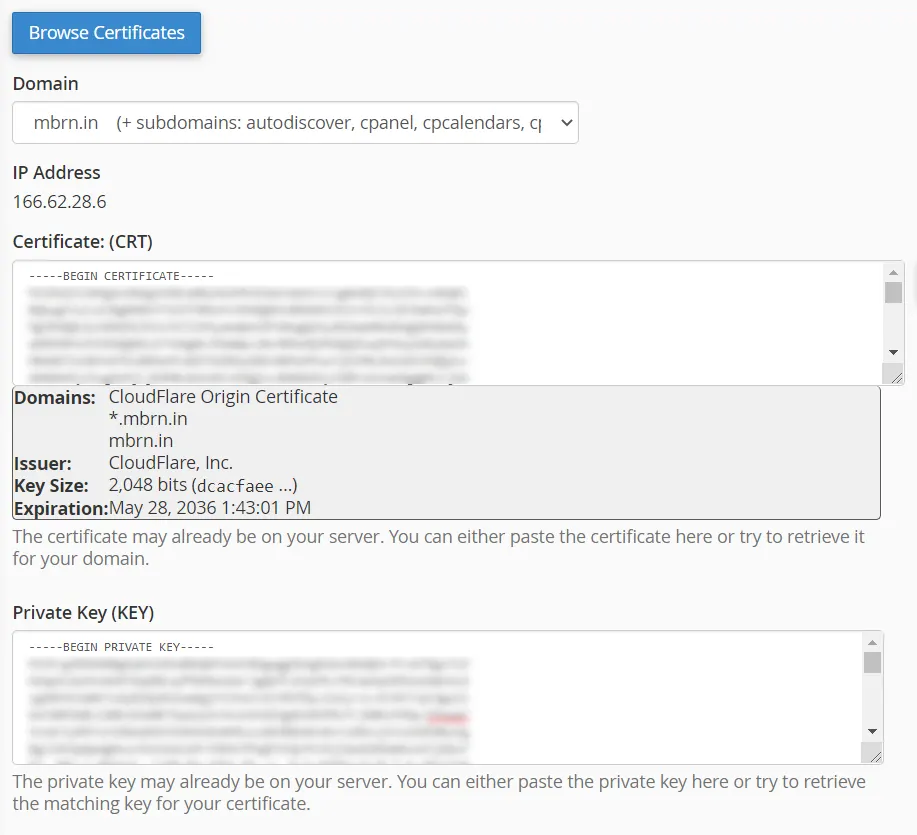
Now copy the Origin Certificate from cloudfare & paste it under Certificate: (CRT) in your cPanel.
Next copy the Private Key from Cloudfare & paste it under Private Key (KEY) in your cPanel.
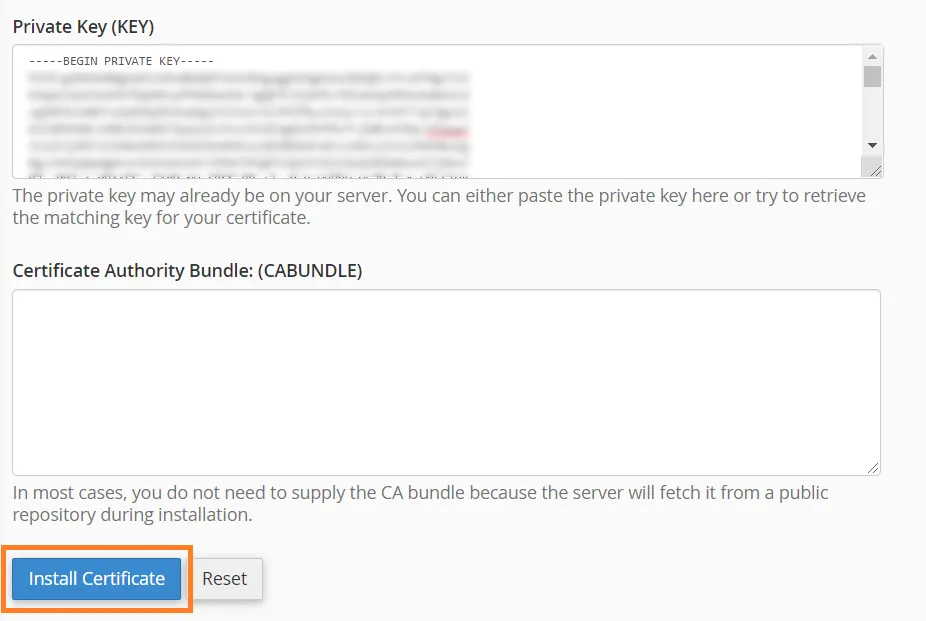
Finally click on Install Certificate to finalize installation of certificates.
Part 4: Change SSL/TLS Encryption to Full (strict) Mode on Cloudflare
Most importantly, you need to turn on the “Full (strict)” mode in your Cloudflare settings.
In your Cloudflare account, “SSL/TLS” > “Overview”, set the SSL/TLS encryption mode to “Full (strict)”.

Summary
In this guide you learnt how to obtain a SSL certificate for free from Cloudfare & use it to secure your cPanel based website.